Here is how to enter routes and waypoints in SeaNav Mac
Left mouse click on the chart and select “Start new route here”
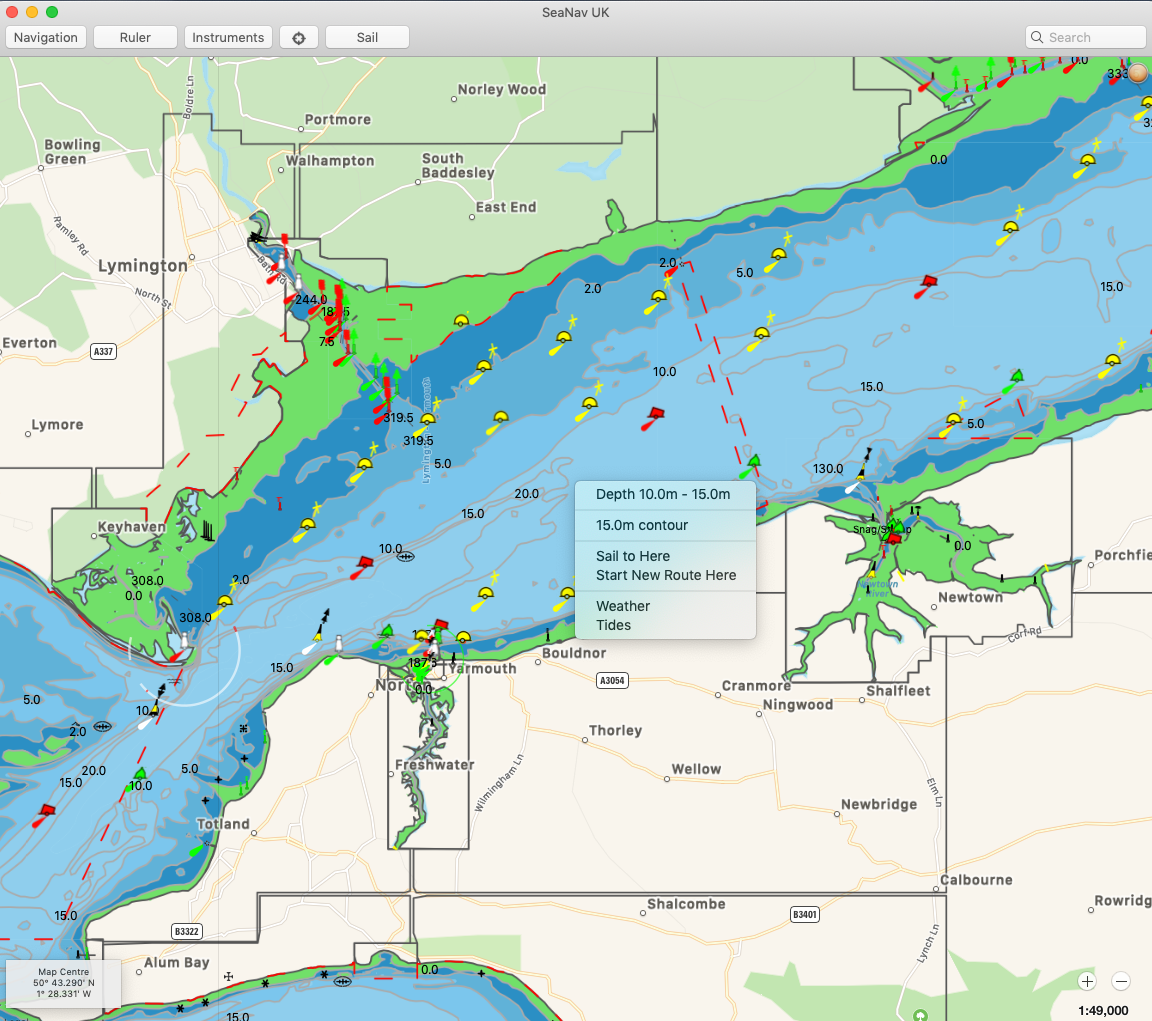
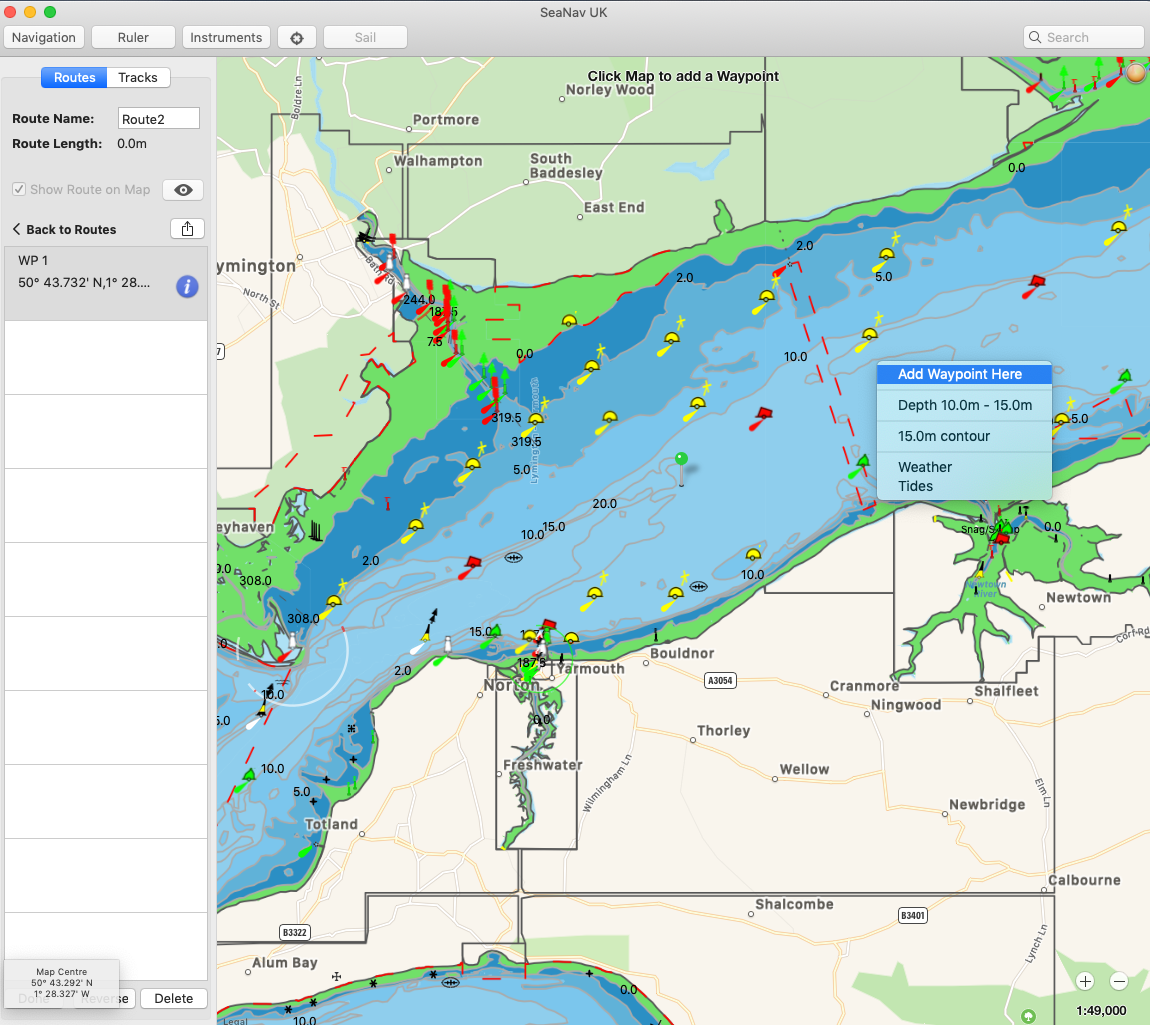
A green pin will be placed on the map and the Navigation panel will display on the left with the first waypoint information.
To add the next waypoint move to another point and left mouse click and select “Add waypoint here”.
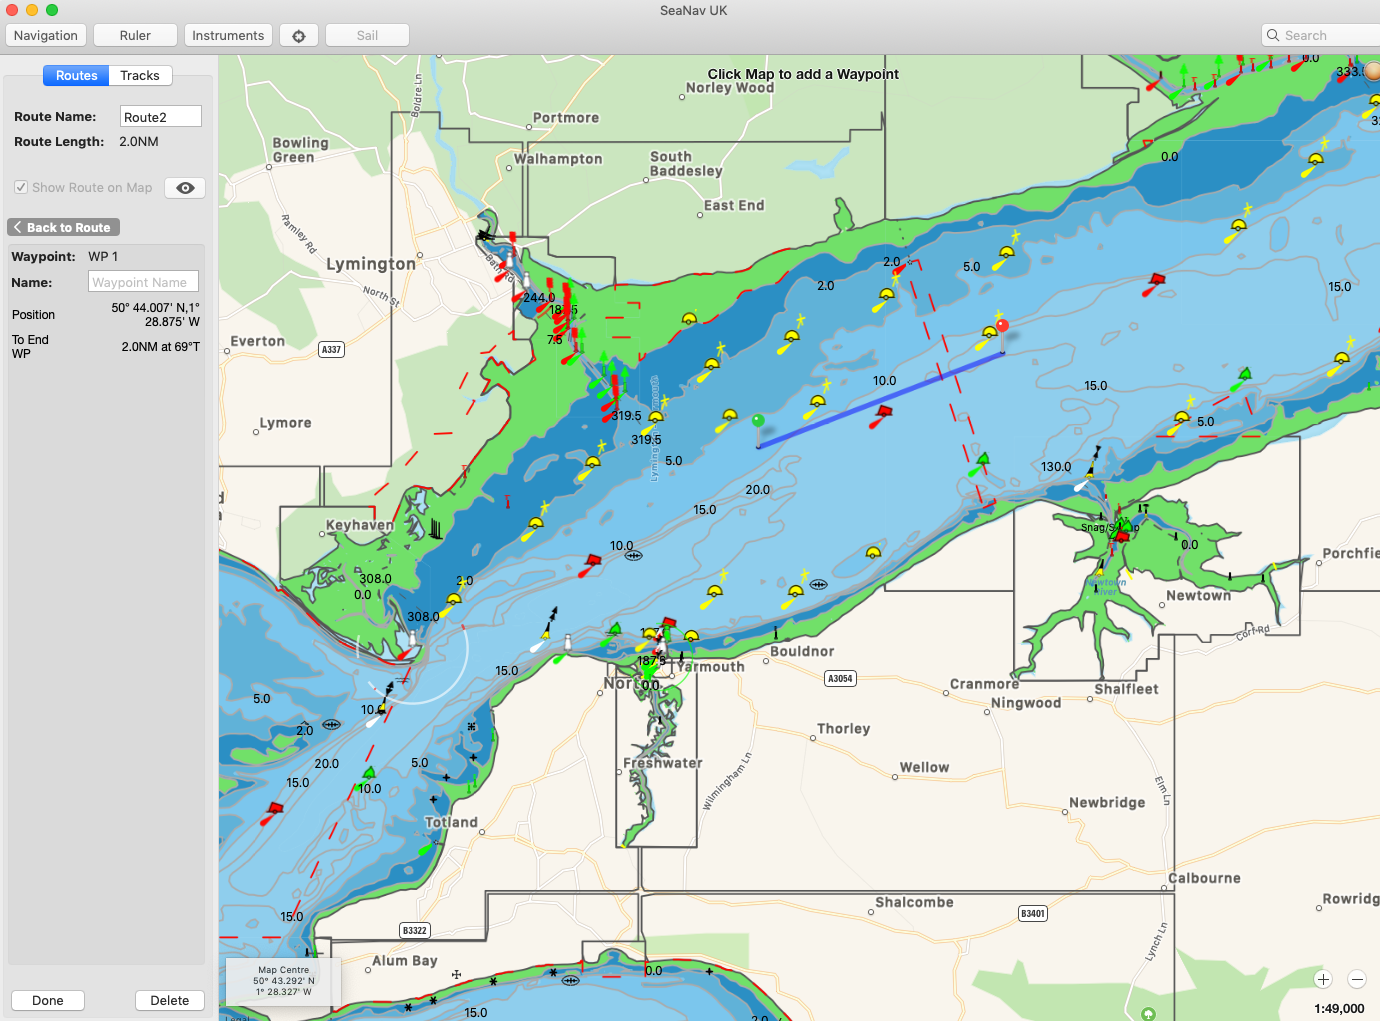
A red pin will appear with a blue line (route) from the first pin.
You can add as many waypoints as you require and drag and drop the waypoint markers using a long mouse select on them.
Tap the i button on a Waypoint to give it a name ( optional) and view the full lat and long position ( including when you drag and drop it) so you can set its location precisely.
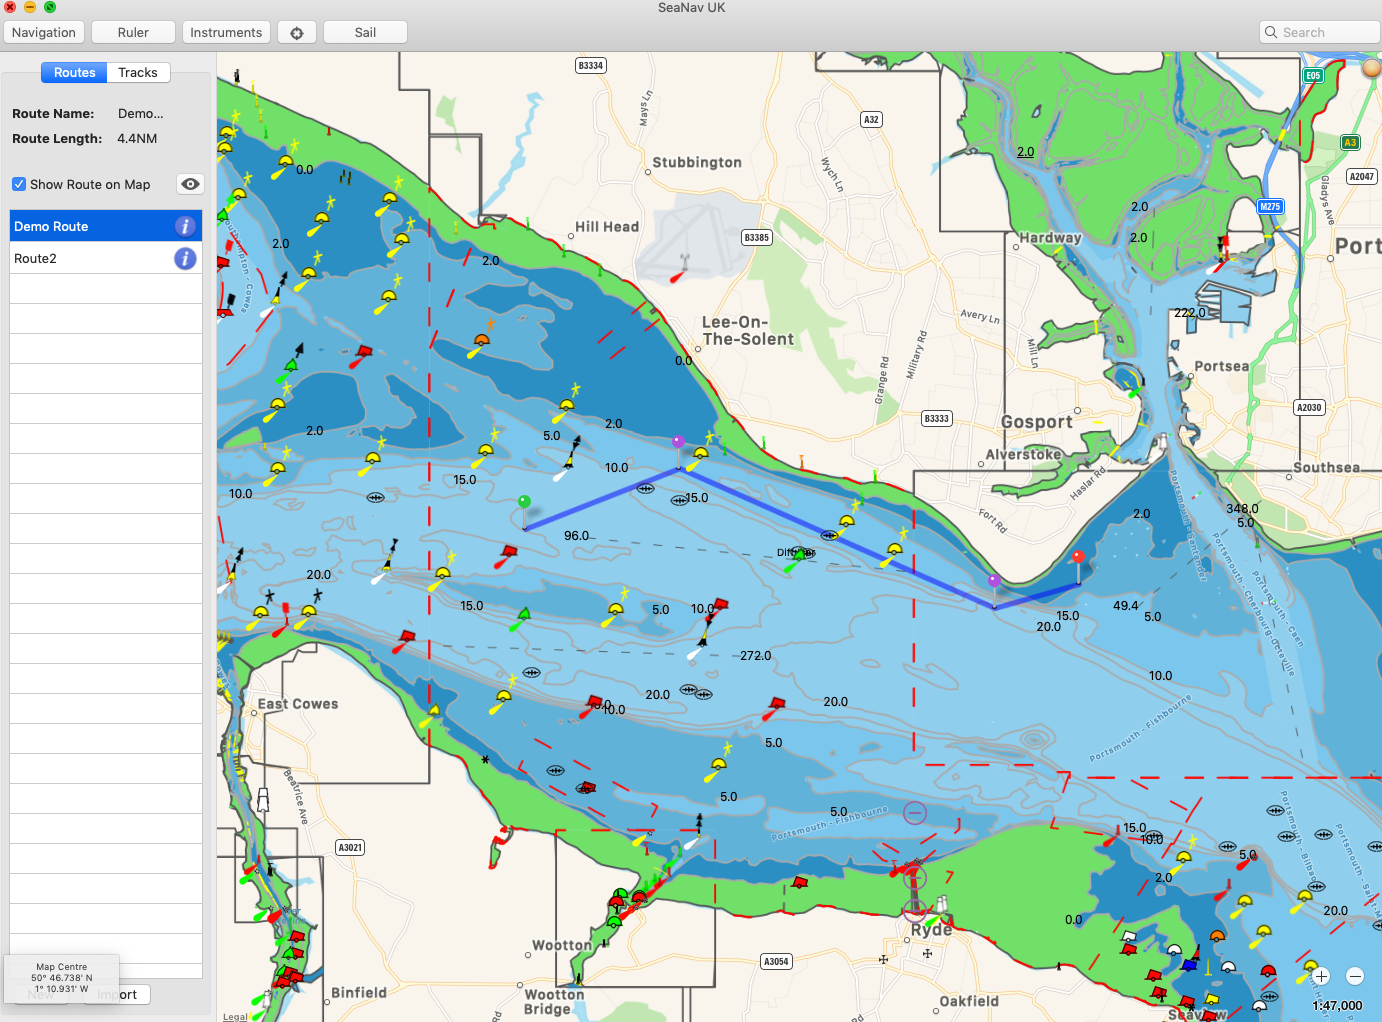
Click on Done when finished and you can then sail the route at any time by pressing Sail. You can also select a previously saved route, Sail it , edit it or export it.
You can add a set of existing waypoints from a spreadsheet following this blog article:-
Here’s our guide on iPhone which also has some relevance to Mac. You can also export/import routes between the iOS SeaNav and Mac SeaNav app and also view them in Google Earth.
You can view the routes at any time by tapping the Navigation tab – there is a Demo route in the Solent included with the app that you can use to play with (tap the i button to view the route details and select Edit Route) :-