
Here is a quick guide on how to add a new route in SeaNav
Tap the route button at the bottom of the screen.

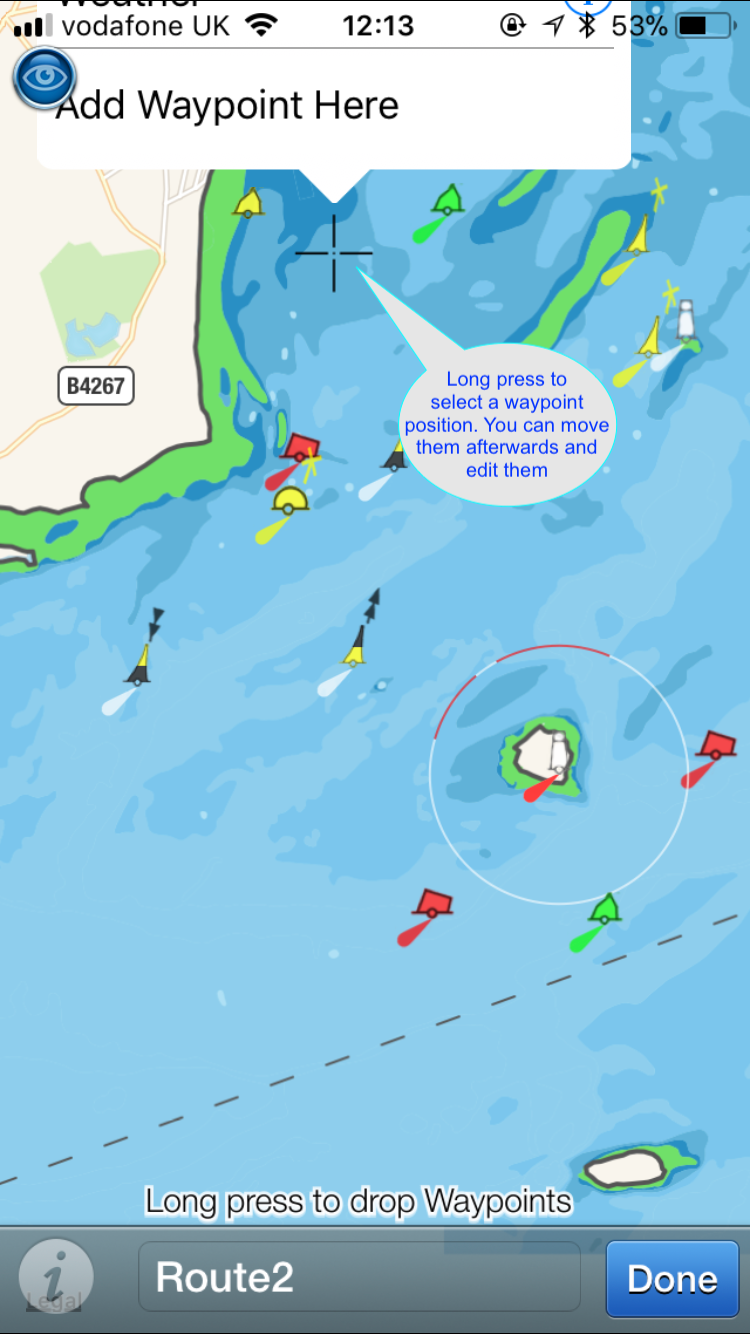
Long press on the chart where you want to add a waypoint and tap “Add Waypoint here” on the popup.
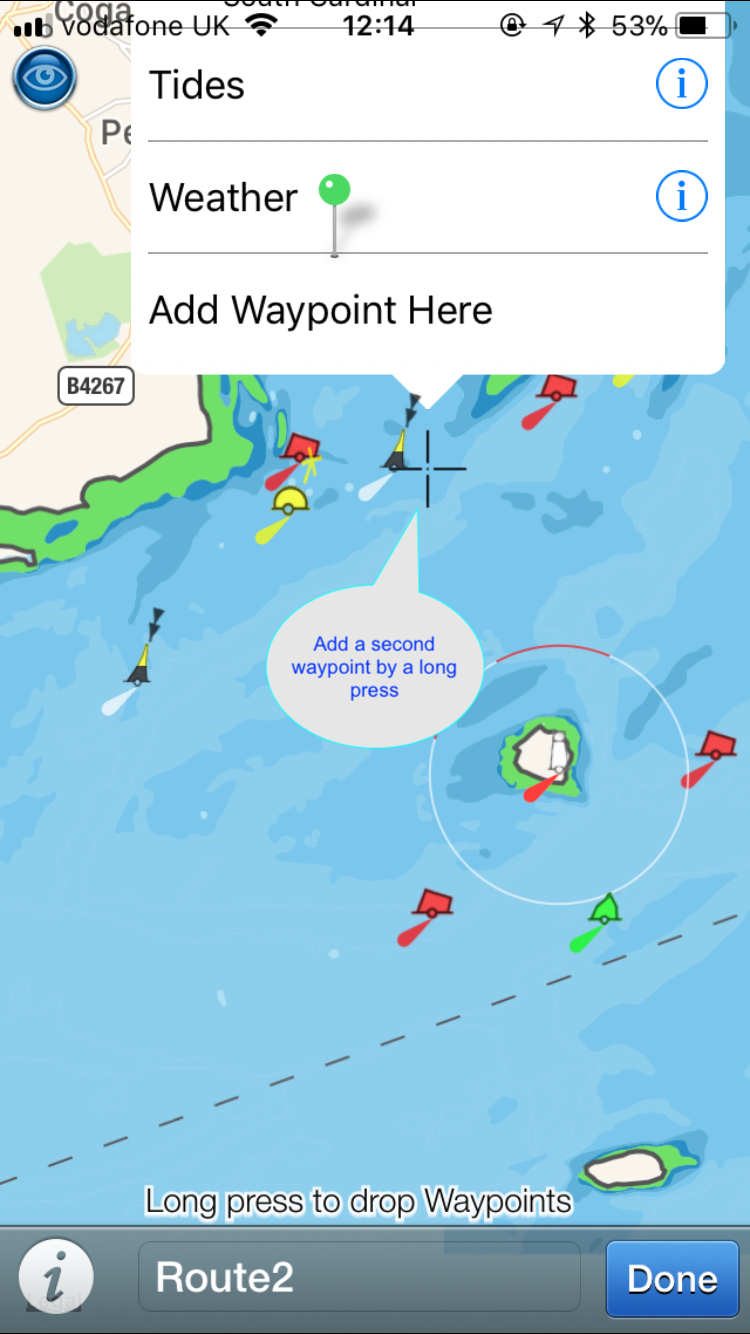
Add the next waypoint in the same way
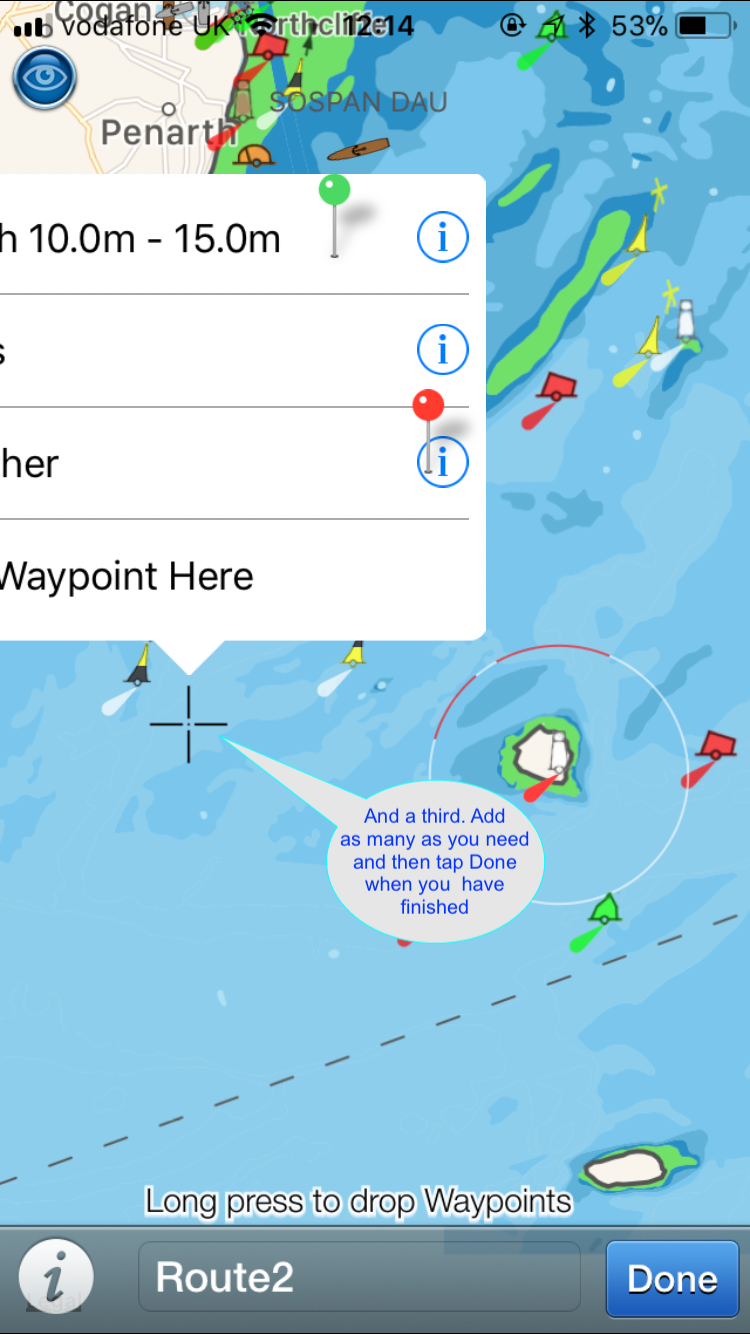
And a third and as may as you want and then tap Done when you have finished. You can move the waypoints you have already added using a long press on one to select it and then dragging it to the desired position. You can also edit the exact position (latitude and longitude) later in the Manage Routes view.
After pressing Done the route will be shown on your chart. You can then start sailing the route or tap the Route icon again to Edit or Manage your routes.
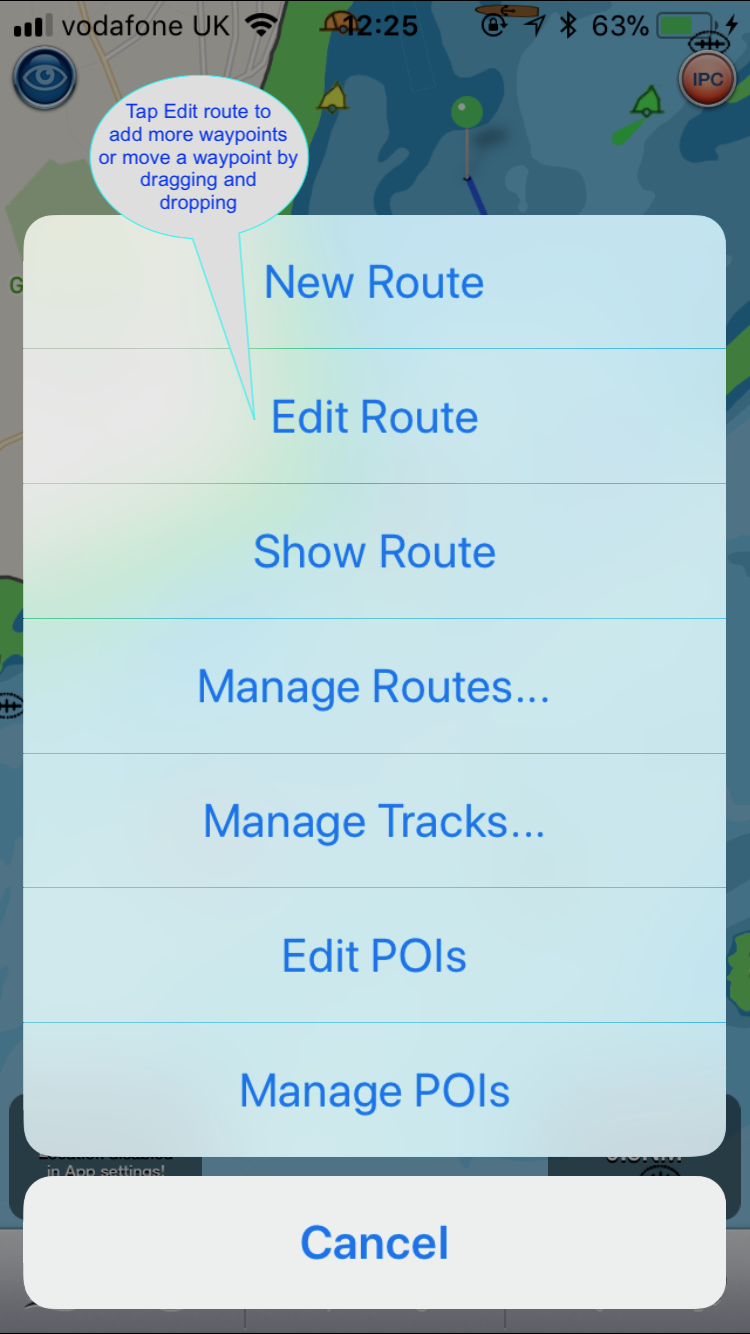
Tap Manage Routes to see all your routes and select a different one of manually edit the current one.
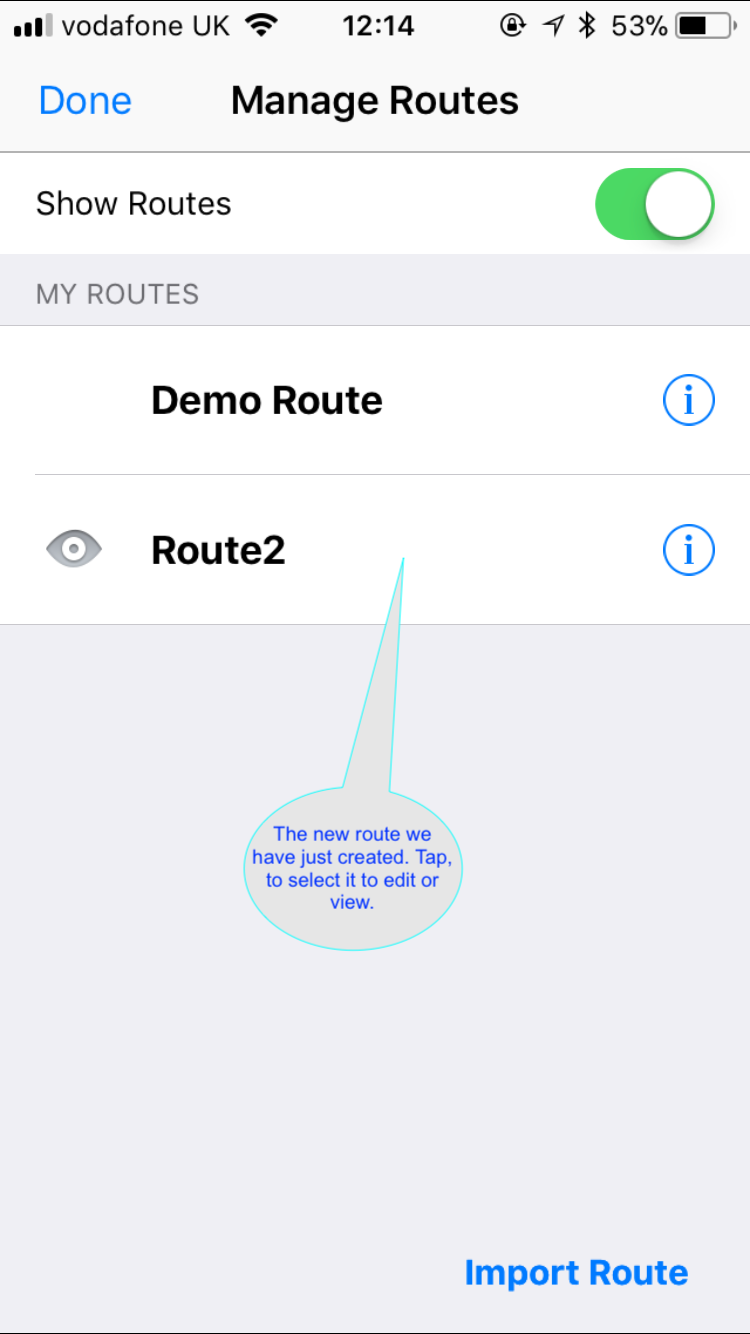
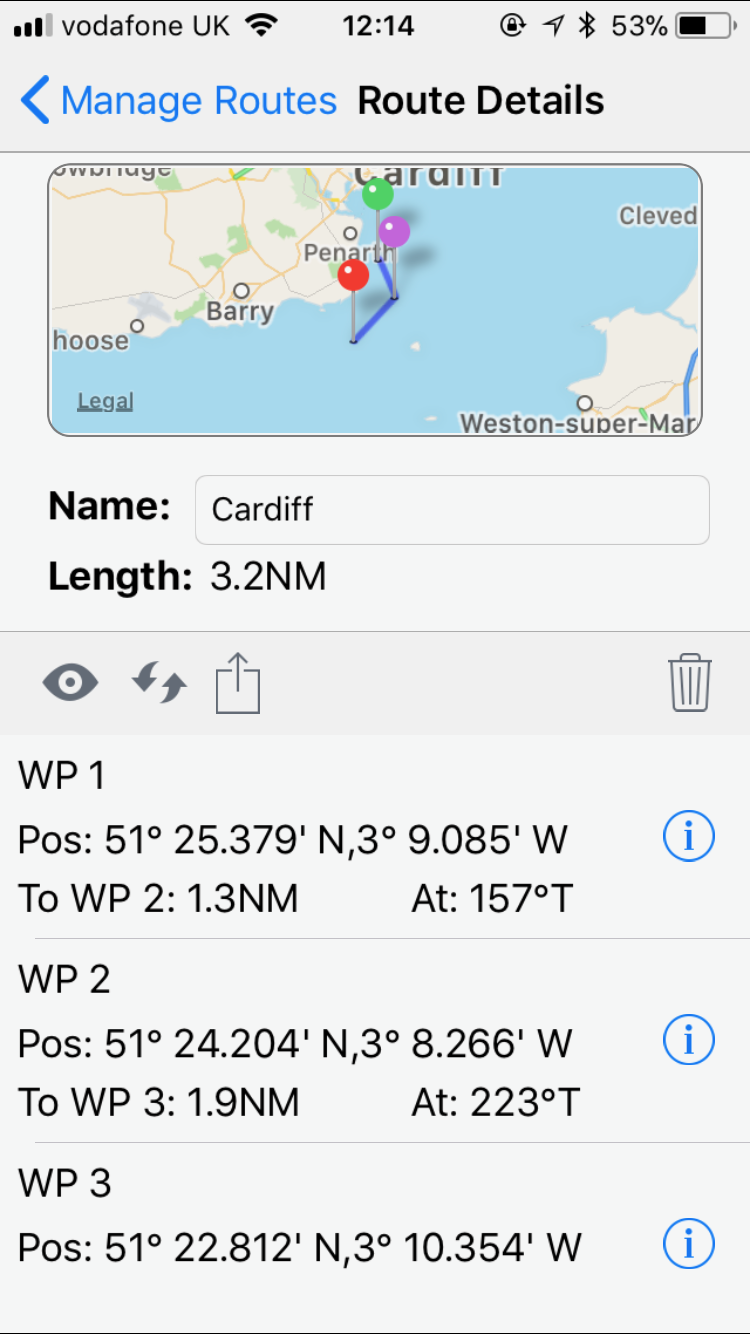
Tap the i button next to a route to see more detail. You can also edit the fields on the detailed view. For instance change the route name from Route2 to Cardiff. Tap the i next to a Waypoint to add names for the waypoints and edit their precise latitude and longitudes. You can enter the latitudes and longitudes in most formats ( e.g. Degrees Minute Seconds, Degrees Minutes and Decimal Degrees (e.g. 52.1345) ) and you do not need to enter the degree, minute or second symbols. Here are some examples:-
DM : 28° 52.634 ́ N can be entered as 28 54.634
DMS :28° 52′ 48″W can be entered as 28 52 48W or -28 52 48
This view also lets you export the route via email or dropbox to share with others, keep a backup or share with your iPad or Mac (tap the box with an arrow going upwards from it).
If you have any questions please email us at support@pocketmariner.com or view the SeaNav User Guide here:- https://seanav.net/charts/help.html