
You can use SeaNav to enter and edit race courses, share these with others and navigate the course. Typically a club will have several race marker buoys and on any particular day set up a course using a subset of them plus possibly other fixed buoys in a particular order to best suit the conditions. This article shows you how easy and useful it is to do this using SeaNav in three easy steps:-
- Ready. Enter all the race markers as POIs ( and use the SeaNav yellow flag race marker style). Typically you only need to do this once a year or less.
- Set. Create a route from the ones you want to use as the course.
- Go. Start racing the course.
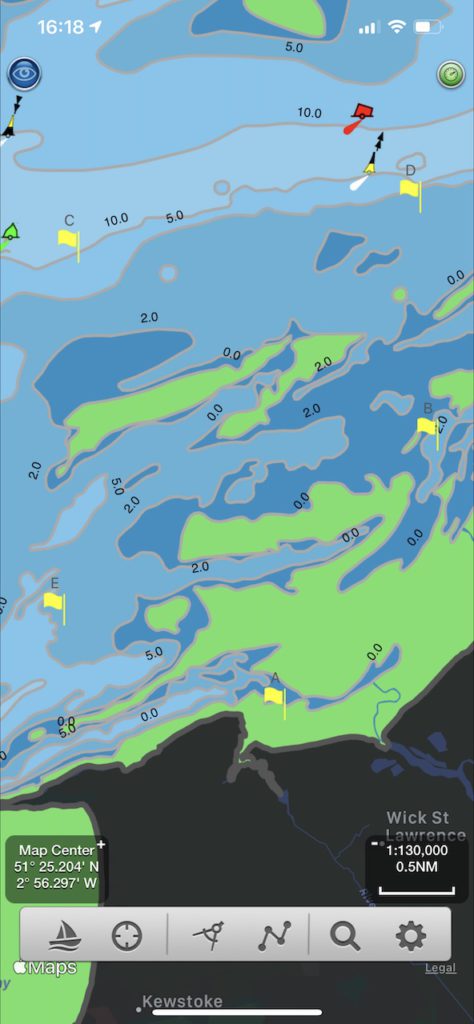
First step – Ready. Set up all the club’s race markers as POIs in SeaNav. For this example we will have 5 race marker buoys labelled A through E. Create each one by long pressing on the chart and tapping “Add POI here”
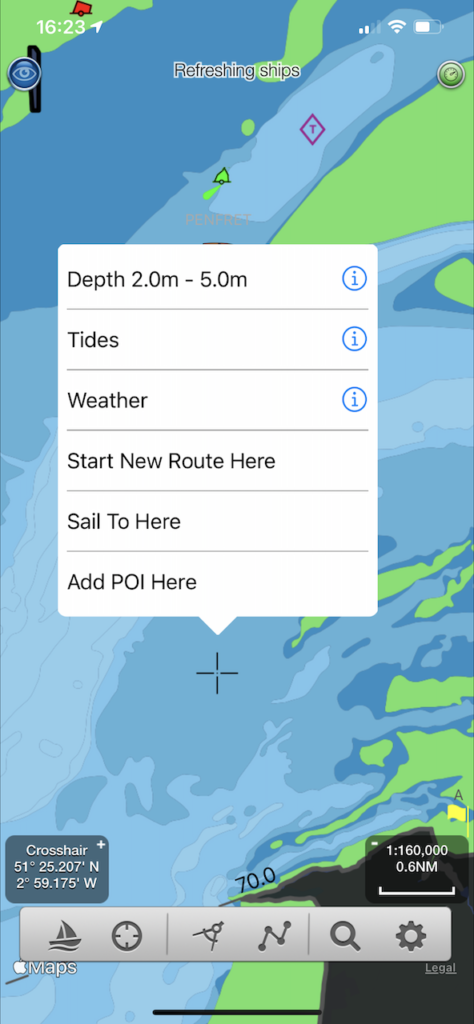
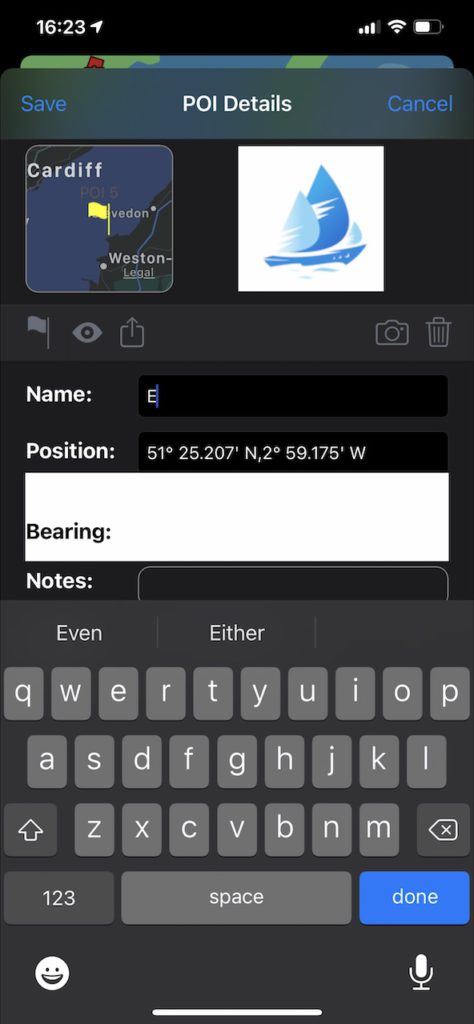
You can enter the buoy name in the edit screen that pops up and also choose the marker type (icon on left above the name field) e.g a yellow flag for a race marker). You can edit the Position Lat/Long if you want to make it more precise/accurate. You can also import the markers from kmz files.
After adding all the race markers, which you typically only need to do once a season, the next step is to set up the course for the day.
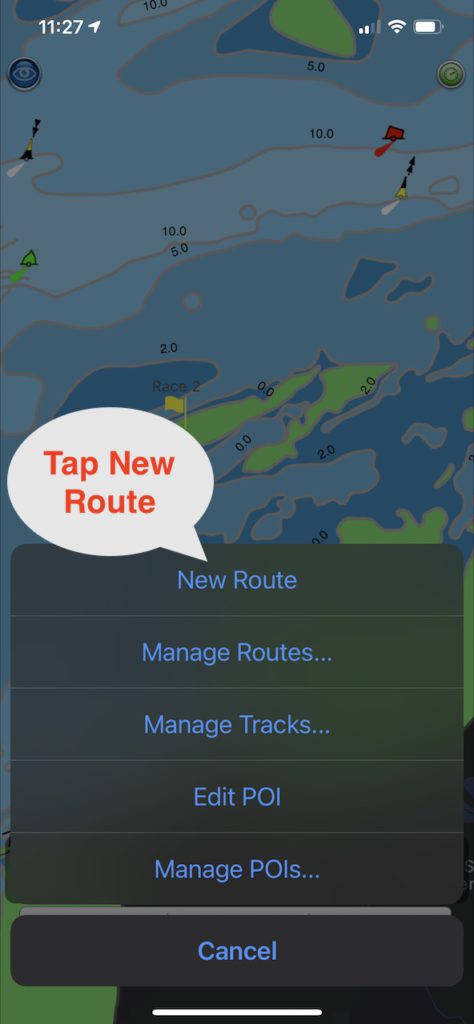
Second Step – Set: Enter the course as a New Route.

Tap the route/poi symbol on the bottom toolbar and then tap “New route”
Enter a race start Waypoint or tap the POI race marker you want to be the start of the race and select “Add Waypoint for POI”. “A” in this example. Cycle through the rest of the markers in the order you want them adding them as waypoints . Here we are adding C and D and then ending back up at A.

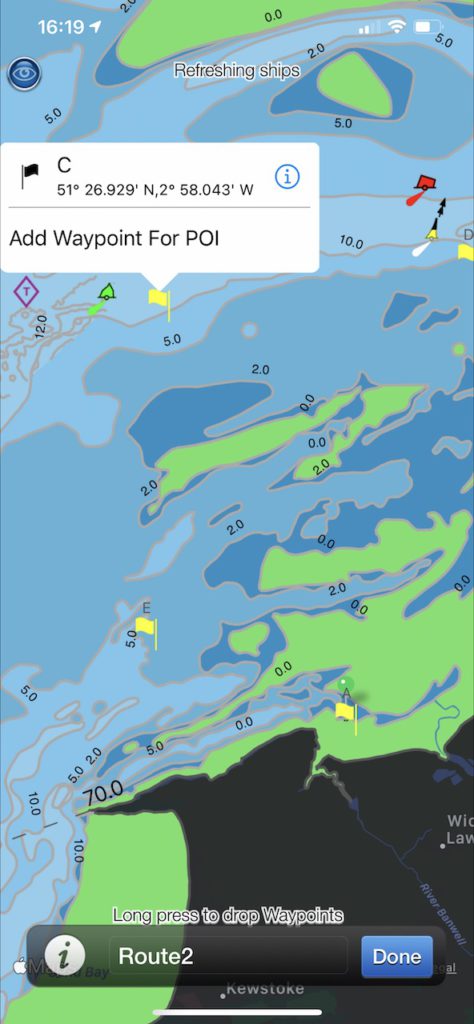
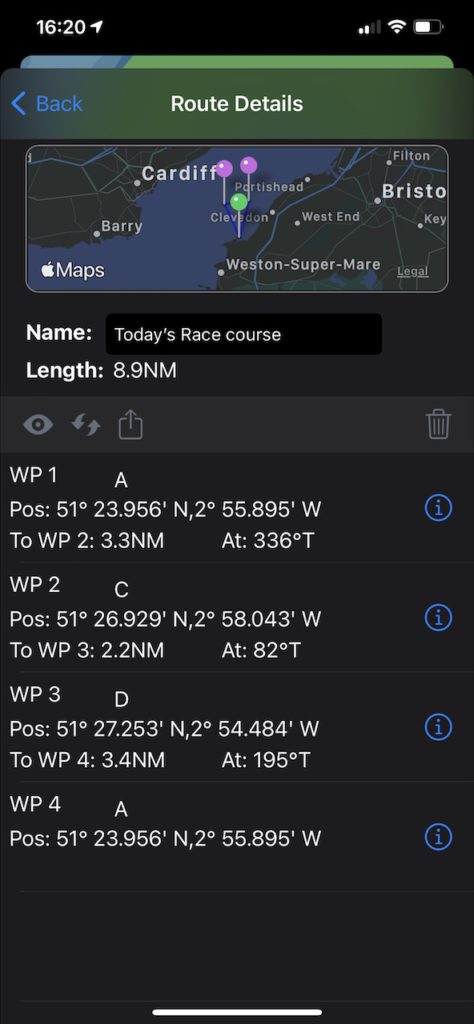
You can end back at the start or at a different marker. You can set a race start/end line using a start and end waypoint markers. Enter a name for the course/route now or later in Manage Routes. Tap Done when you have finished. You can now share the route with others via email or dropbox and also send it to your own email as a back up. In Route details you can see the overall route length and distances between waypoints.
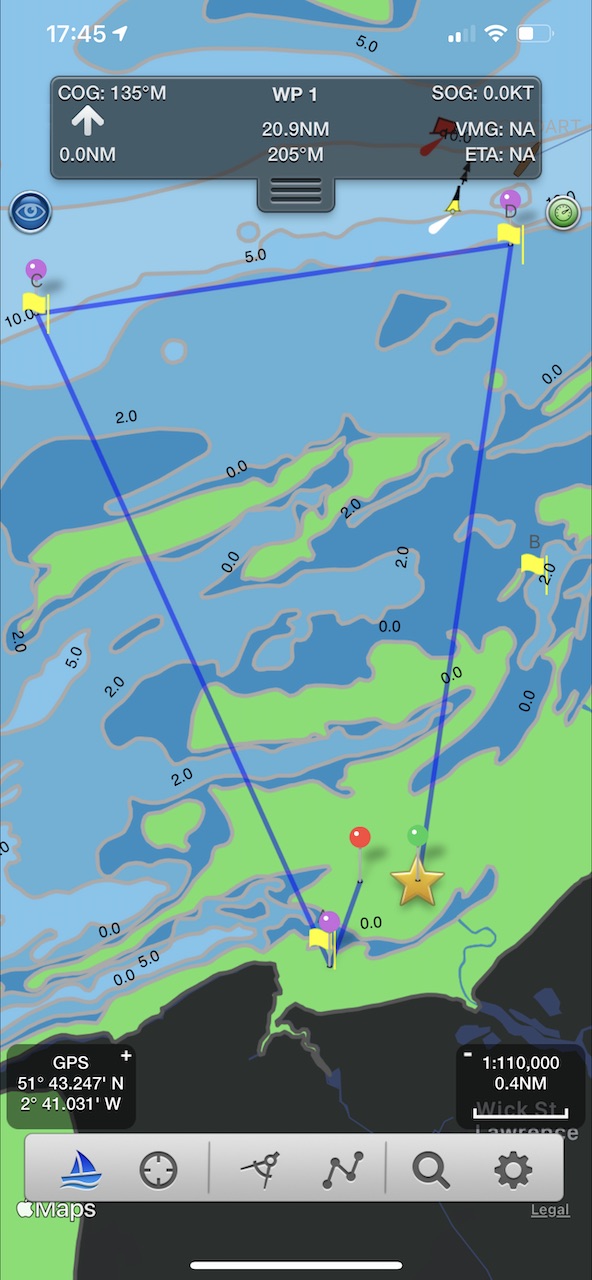
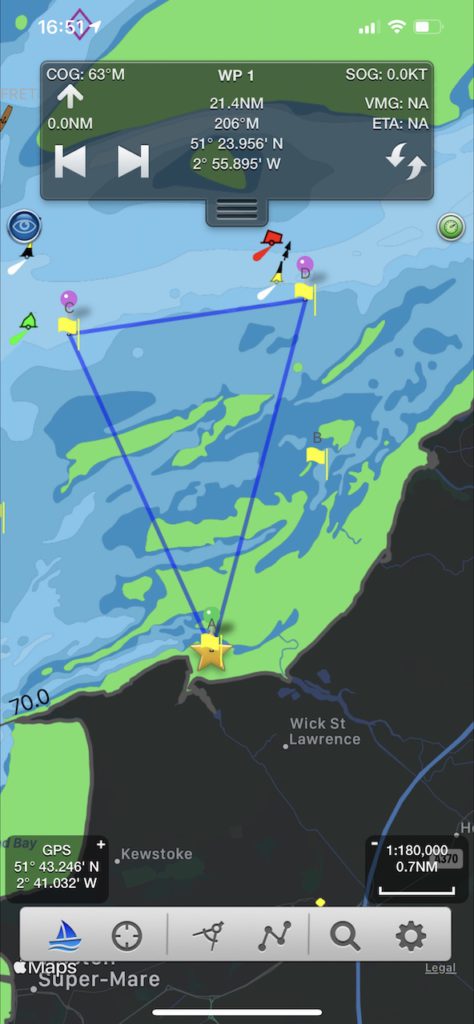
Final Step – Go: To start sailing the course just tap the Sailboat icon bottom left. It will mark the first course mark of the race with a star and show you the distance, bearing and ETA to it. When you reach it, SeaNav will automatically set the next race waypoint for you. You can manually choose the next waypoint in the route using the forward and back tab arrows in the navigation HUD at the top of the screen.
Get racing and good luck!