
Automatically follow your route with SeaNav’s autopilot mode. SeaNav can control Raymarine and Navico/B&G/Simrad/Lowrance auto tillers and helms to sail a SeaNav route. You can also use SeaNav on your iPhone or Apple Watch as a remote control for your Raymarine Tiller and Wheel Pilot
Here is a demonstration sailing a SeaNav demo route in the Pocket Mariner’s shore based lab with a Raymarine ST1000+ Tiller pilot.
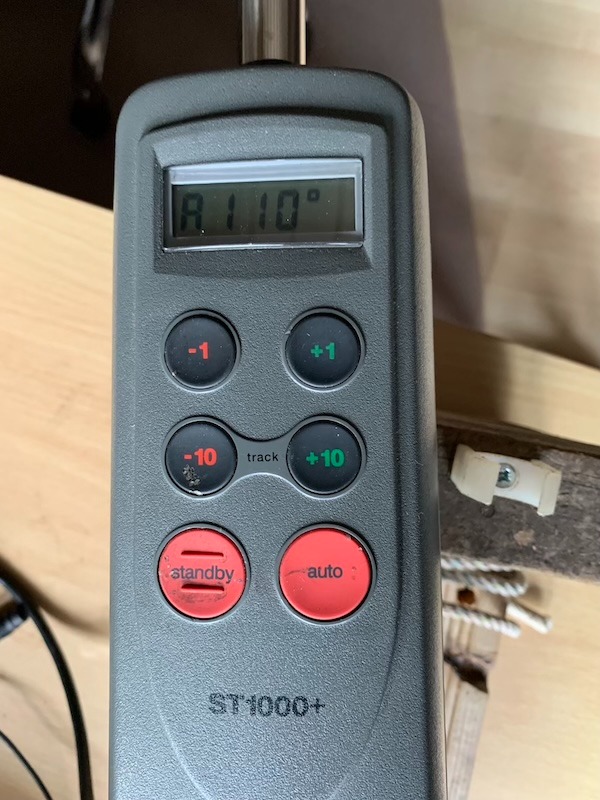
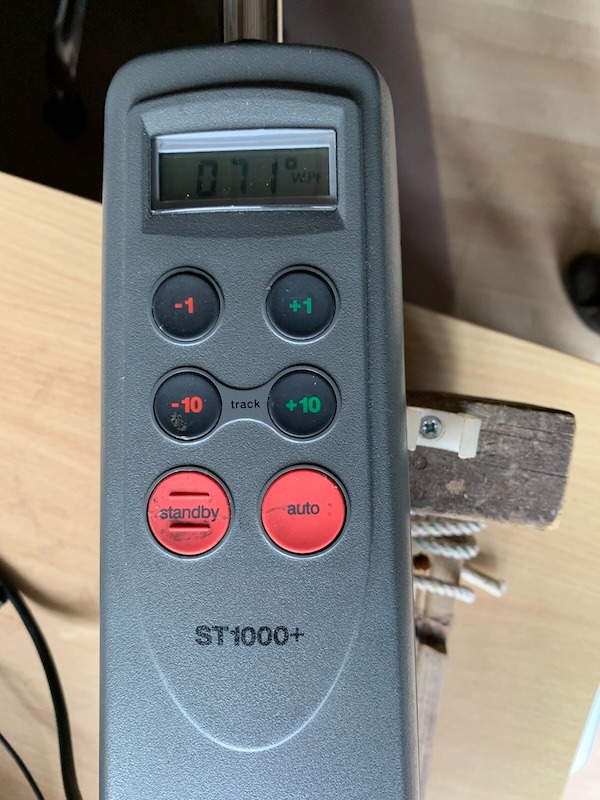
SeaNav running on an iPhone is connected to the Tiller pilot via SEATALK over Wifi using the OnWatch Wifi adapter. The current boat’s heading is 110° and we are in Auto mode on the Tiller pilot maintaining that heading.
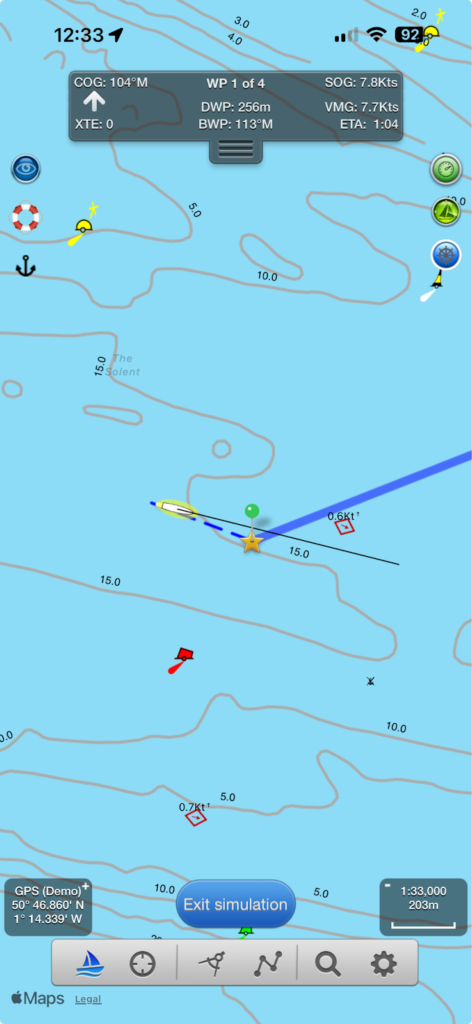
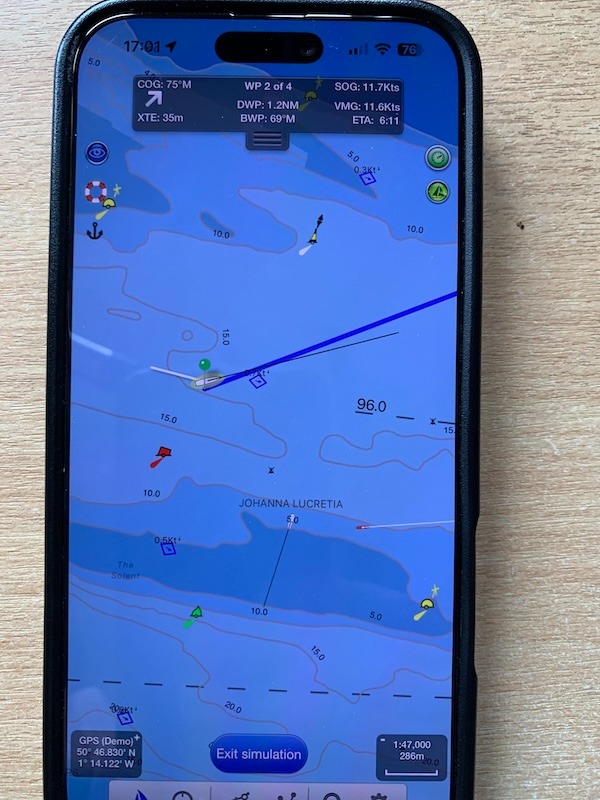
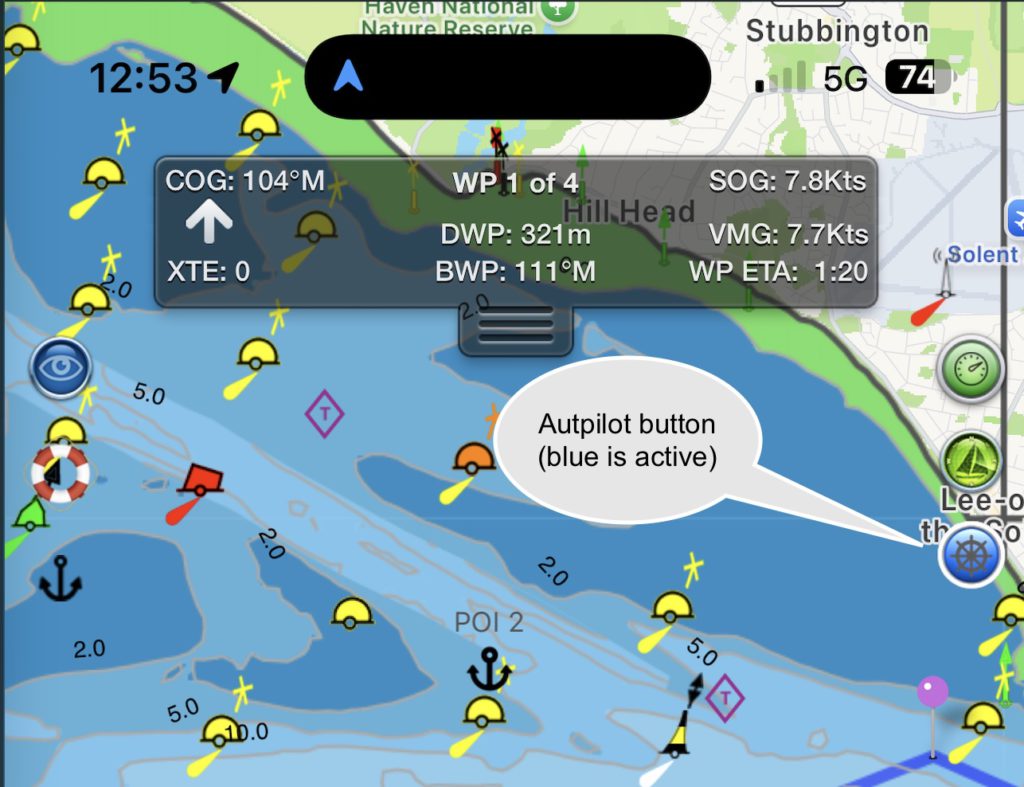
We start sailing the route in SeaNav by tapping the sailboat icon bottom left, note the BWP (Bearing to the first Waypoint is) at the top centre of the screen is 113°.
SeaNav tells the autopilot the course to steer to the first Waypoint from our current position. As the BWP is 113° and the boat is currently sailing 110° the tiller pilot tells us it needs to change course (it beeps) and shows us which way it is going to turn; to Starboard on a new course heading of 113°.
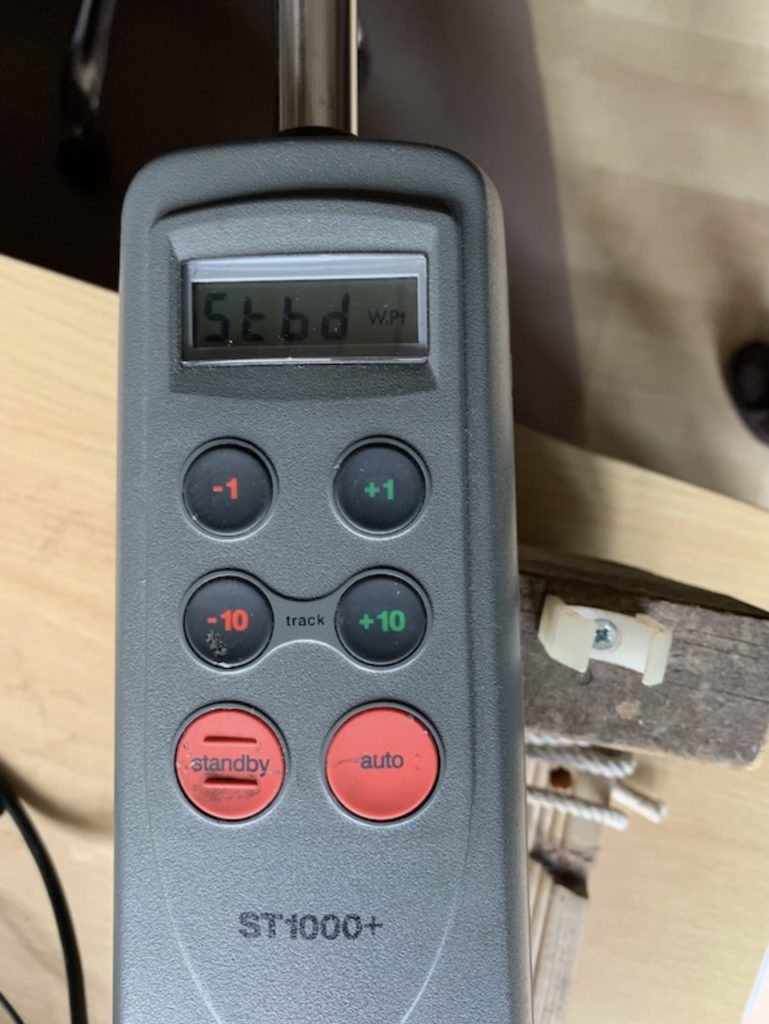

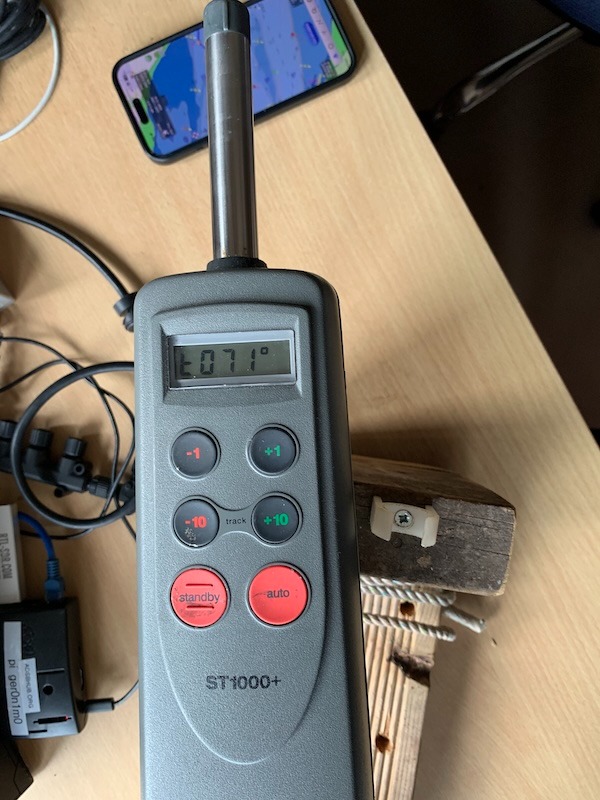
Press -10 and +10 together on the Tiller (Track) to accept the new course. The tiller pilot stops beeping and shows us the distance to the 1st Waypoint is now 0.1nm using the information from SeaNav.

We reach the 1st waypoint and SeaNav tells the tiller pilot we need to change course again to Waypoint 2. The tiller pilot sounds the Waypoint changed alert and shows us the new course , the direction it is going to turn (to port). Pressing Track again (-10 and +10 pressed at the same time) accepts the course change.

The tiller pilot stops beeping and changes our boat’s heading ( simulated by rotating the tiller pilot on the desktop) until we are lined up with 71° (note the t in front of the course showing it is in tracking mode). The tiller display then continually cycles through the new course information showing us the course, off track error and distance to the second waypoint (DWP) 1.2nm updated by SeaNav as we sail towards waypoint 2.
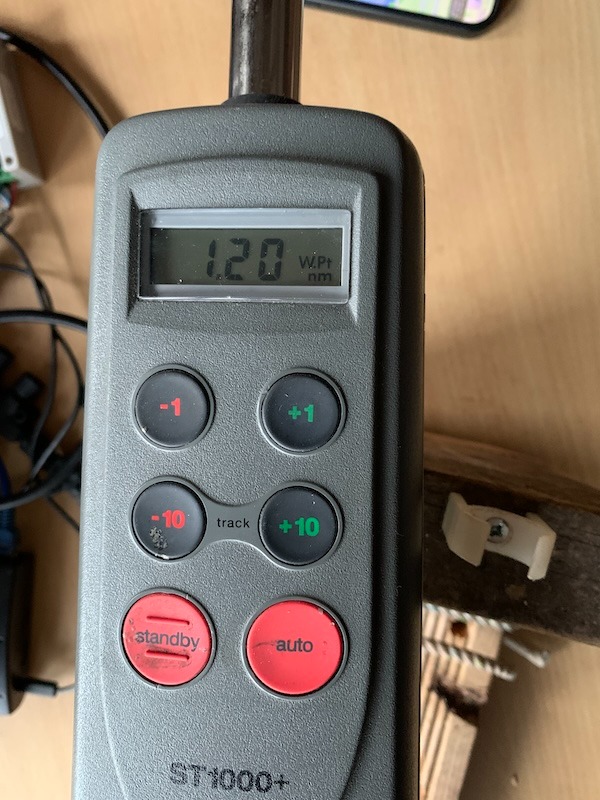
and here we are heading for Waypoint 2 in SeaNav. There is an optional advanced mode where SeaNav will automatically tell the Tiller to accept the new course without the need to Press the Track mode on the tiller – see below.
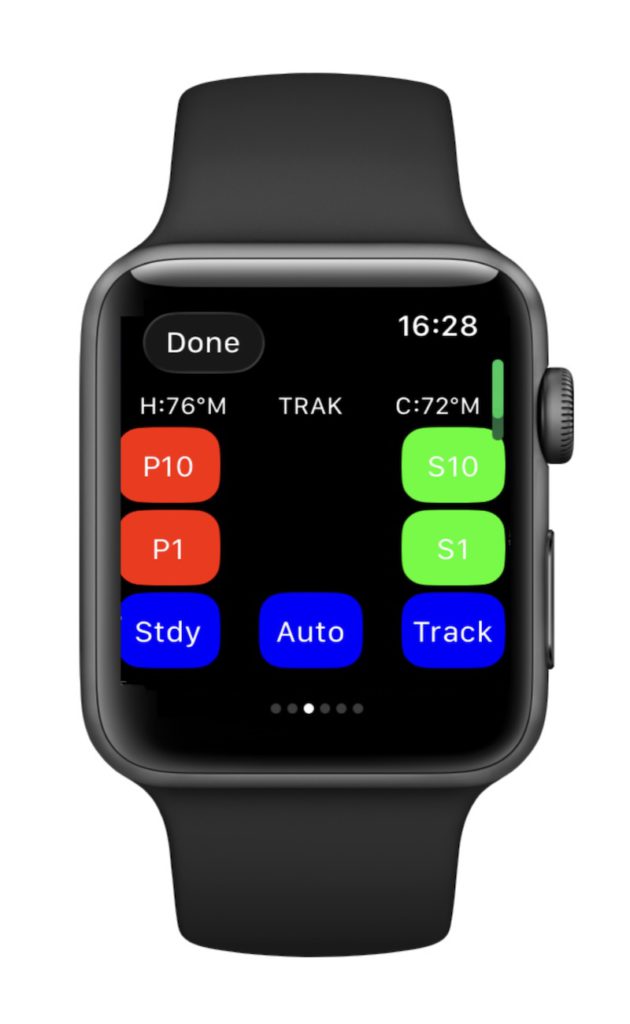
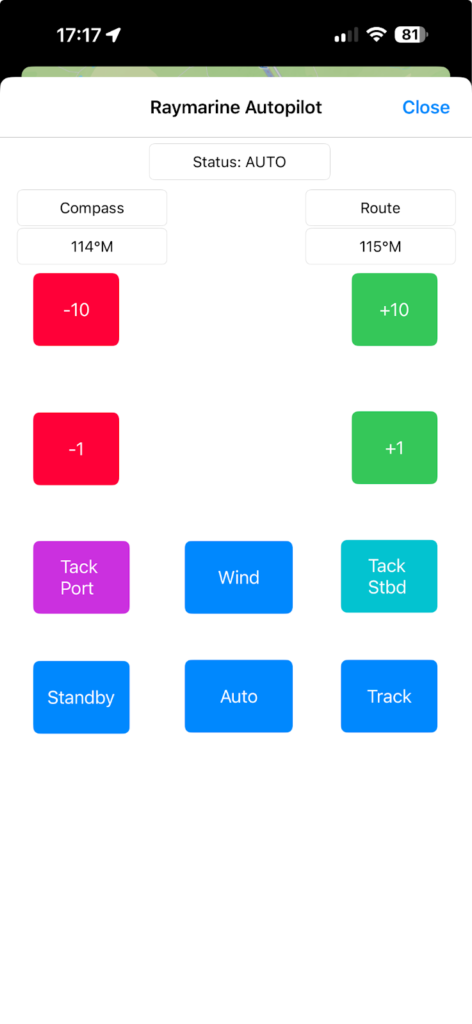
SeaNav can remotely control the Auto tiller buttons and view its status (tap the autohelm button towards the top right of the screen in SeaNav to show the remote control buttons and Autopilot status) :-
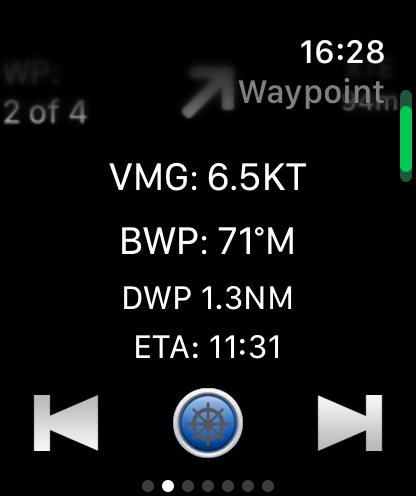
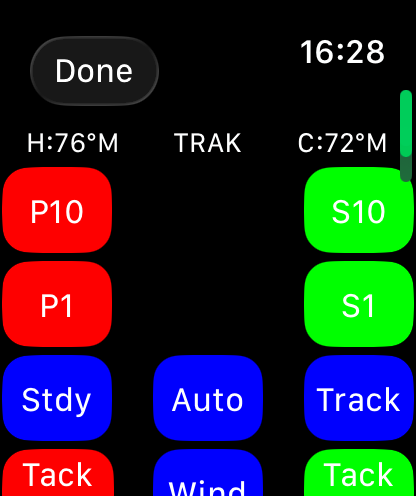
The SeaNav Apple Watch can also control the Raymarine AutoPilot. Tap the autopilot symbol (blue bottom centre) on the Waypoint watchface to view the AutoPilot status and controls:-
Setting up SeaNav to use a Raymarine AutoPilot with the OnWatch Wifi adapter.
Hardware setup
Raymarine ST1000+ and 2000+
Only 3 wires need to be connected, Yellow SeaTalk, 12V brown (+ve) and blue (-ve).
The Raymarine ST1000+/20000+ Tiller pilot has 5 wires in its connecting cable – brown, blue, yellow, green and white.

Connect the yellow SeaTalk wire/terminal(4) from the Raymarine Autohelm/tiller to the Data terminal (far left) on the OnWatch device.
Connect 12V and GND on the OnWatch to the 12V brown (+ve) and blue (-ve) auto tiller power leads or boat supply (pin 1 +and 2 -).
Raymarine ST4000+
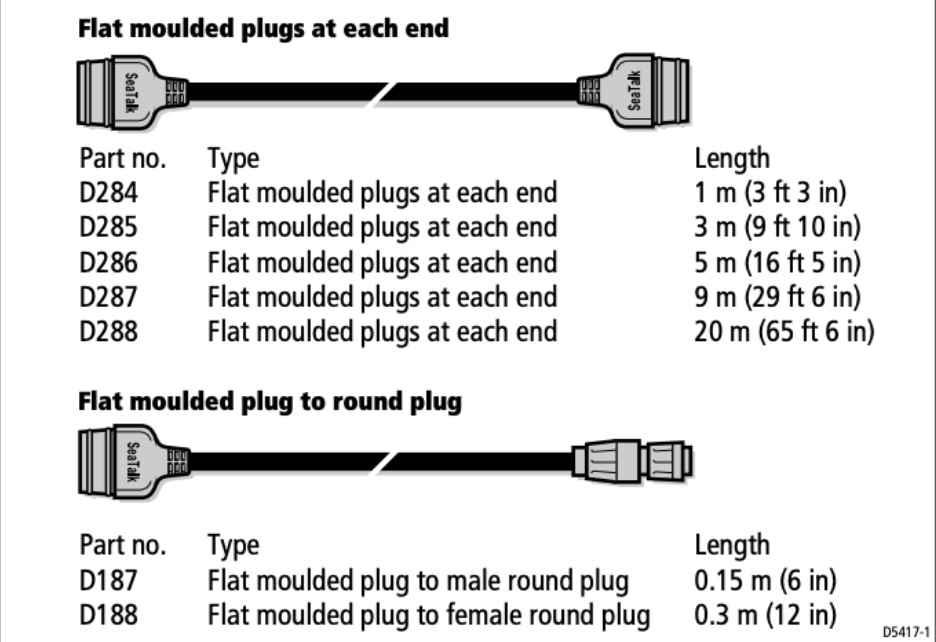
Connect the OnWatch Adapter to 12V and the SeaTalk bus using a SeaTalk cable from the control unit rear as above. The correct part number for the cable with a connector one end and bare wires the other is D229 (also Rul-4001-136-A). You can use a SeaTalk cable and cut a connector off one end. The SeaTalk cable data wire is yellow, the + and – 12V wires are usually red (+ve) and black (-ve/gnd).
iPhone and SeaNav configuration
Set the iPhone to use the OnWatch wifi network and connect to it. (default password 12345678)
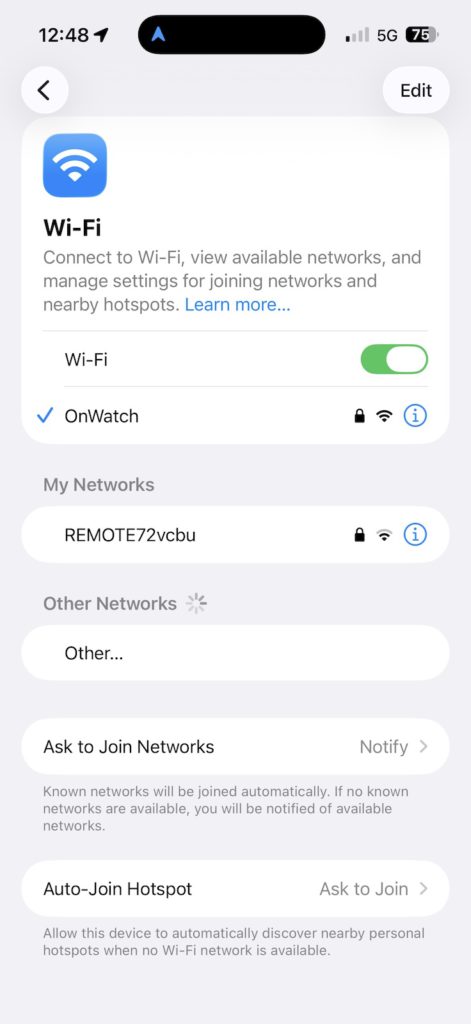
Now configure SeaNav to talk and listen to the AutoPilot. Go to Settings/AIS, GPS & NMEA Link .
Configure it to use TCP to IP address 192.168.8.1 , port 2001 . Set the AutoPilot switch on. If the hardware is all connected up you can tap Start and should see live data from the AutoPilot. Blue for received messages and green for sent.
Back on the SeaNav chart view the Autopilot symbol top right should now be green and if you tap it you can see the Raymarine Autopilot status and remote controls.
You are now ready to sail a SeaNav route automatically. Make sure the Autopilot/tiller is in Auto mode and then just start sailing a route or to a point by tapping the Sailboat icon. Press Track mode on the Autopilot/tiller to start following the SeaNav route. The SeaNav autopilot should now be blue.
If you want to disconnect SeaNav from the Autopilot tiller/helm tap the Standby button on the autopilot. Re-connect to the SeaNav route by tapping the Auto button. To completely disconnect, turn off the Autopilot switch in SeaNav Settings/AIS, GPS & NMEA Link or stop the link.
AutoTrack
You can set SeaNav to automatically tell the Autopilot/tiller to accept new Waypoints. In Settings/AIS, GPS & NMEA Link tap the AP NMEA Messages button below the Autopilot switch. Then switch AutoTrack on. Now every time a waypoint is reached SeaNav will auto-confirm the waypoint change and you do not need to acknowledge it by pressing the Track buttons on the Auto tiller/pilot. Please use with care as unattended course changes could be un-safe.