
Automatically follow your route with SeaNav’s autopilot mode. SeaNav can control Raymarine and Navico/B&G/Simrad/Lowrance auto tillers and helms to sail a SeaNav route. You can also use SeaNav on your iPhone or Apple Watch as a remote control for your Raymarine Tiller and Wheel Pilot
Please note the SeaNav autopilot feature is currently in Beta and requires an NMEA to WIFI adapter like this NMEA3WIFI gateway . Drop us an email to help@pocketmariner.com if you would like to take part in the Beta program.
Here is a demonstration sailing a SeaNav demo route in the Pocket Mariner’s shore based lab with a Raymarine ST1000+ Tiller pilot.
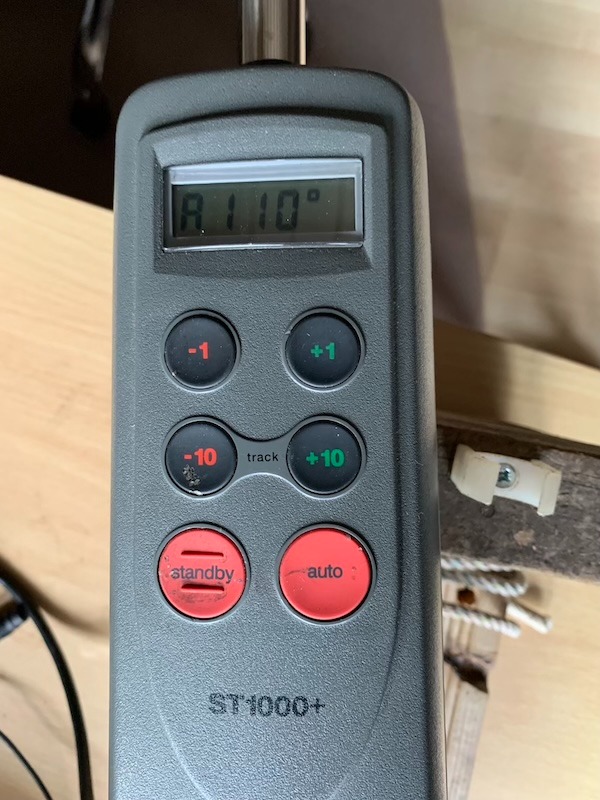
SeaNav (v5.5 build 8 or later) running on an iPhone is connected to the Tiller pilot via SEATALK over Wifi using an NMEA3WIFI gateway. The current boat’s heading is 110° and we are in Auto mode on the Tiller pilot maintaining that heading.
We start sailing the route in SeaNav by tapping the sailboat icon bottom left, note the BWP (Bearing to the first Waypoint is) at the top centre of the screen is 113°.
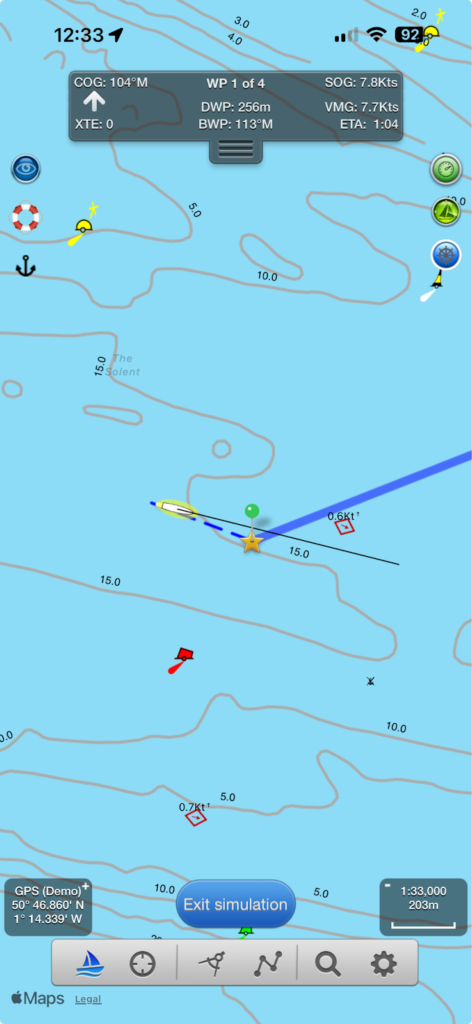
SeaNav tells the autopilot the course to steer to the first Waypoint from our current position. As the BWP is 113° and the boat is currently sailing 110° the tiller pilot tells us it needs to change course (it beeps) and shows us which way it is going to turn; to Starboard on a new course heading of 113°.

and automatically turns the boat to head in that direction. The tiller pilot shows us the distance to the 1st Waypoint is now 0.1nm using the information from SeaNav.

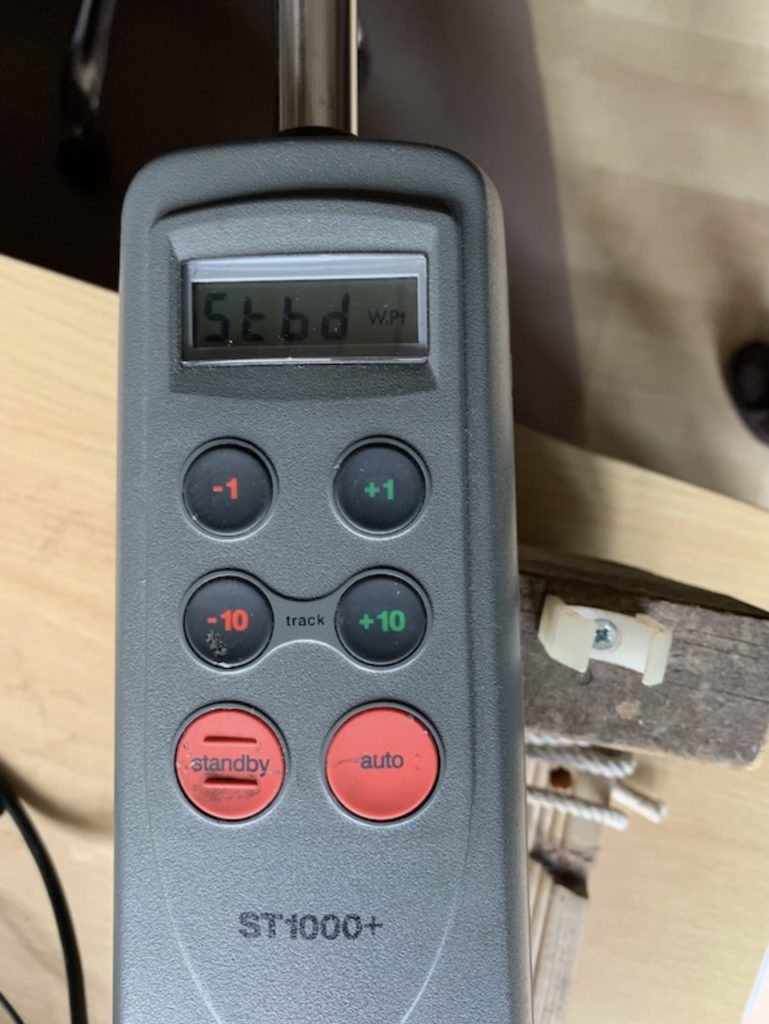
We reach the 1st waypoint and SeaNav tells the tiller pilot we need to change course again to Waypoint 2. The tiller pilot sounds the Waypoint changed alert and shows us the new course , the direction it is going to turn (to port) and turns to it.

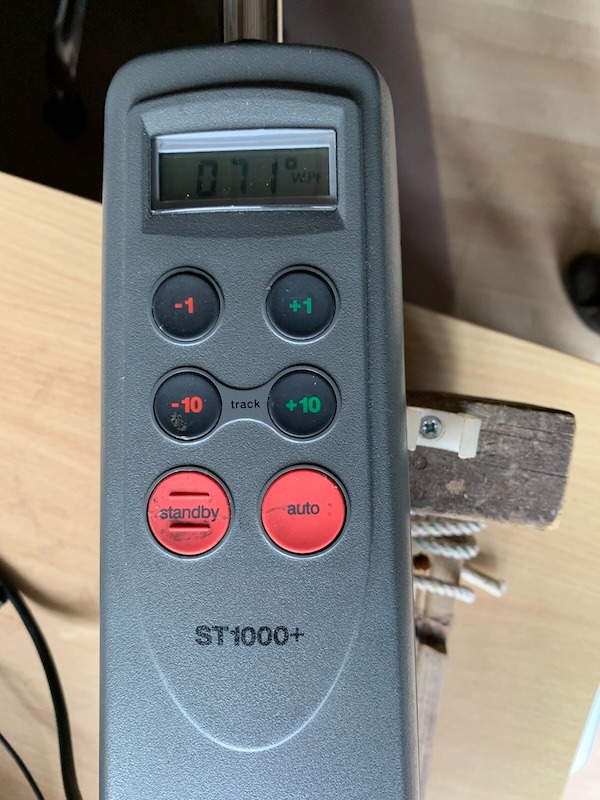
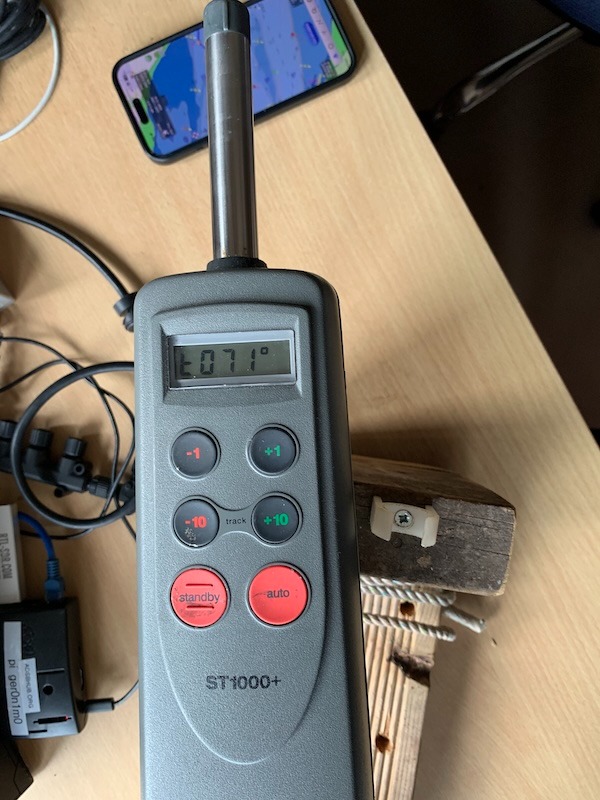
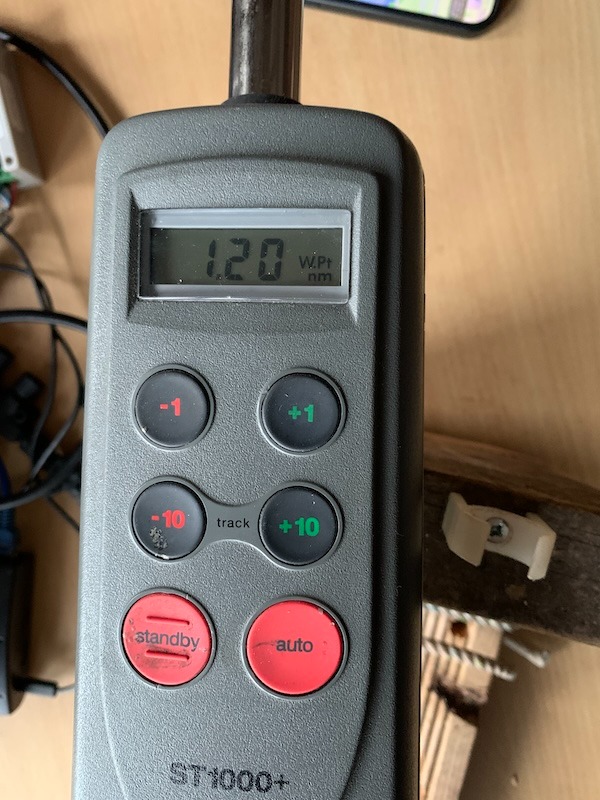
The tiller pilot changes our boat’s heading ( simulated by rotating the tiller pilot on the desktop) until we are lined up with 71° (note the t in front of the course showing it is in tracking mode). The tiller display then continually cycles through the new course information showing us the course, off track error and distance to the second waypoint (DWP) 1.2nm updated by SeaNav as we sail towards waypoint 2.
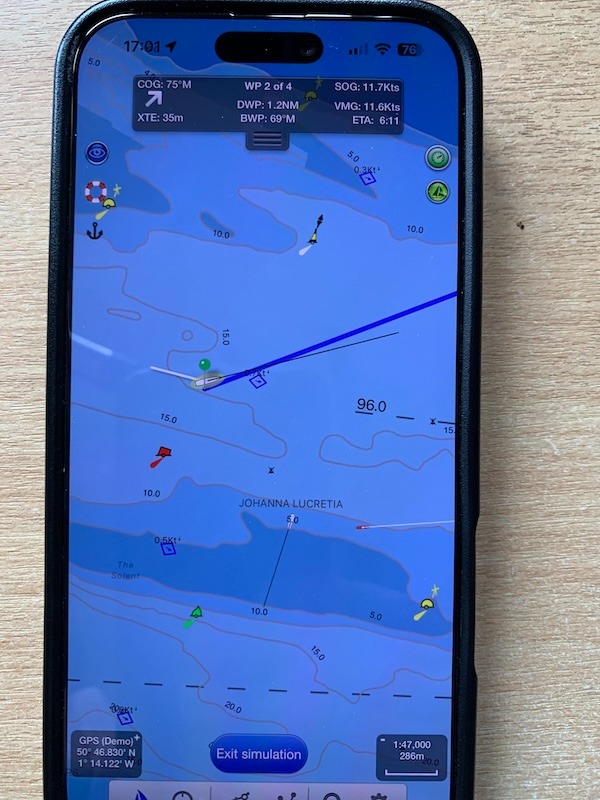
and here we are heading for Waypoint 2 in SeaNav.
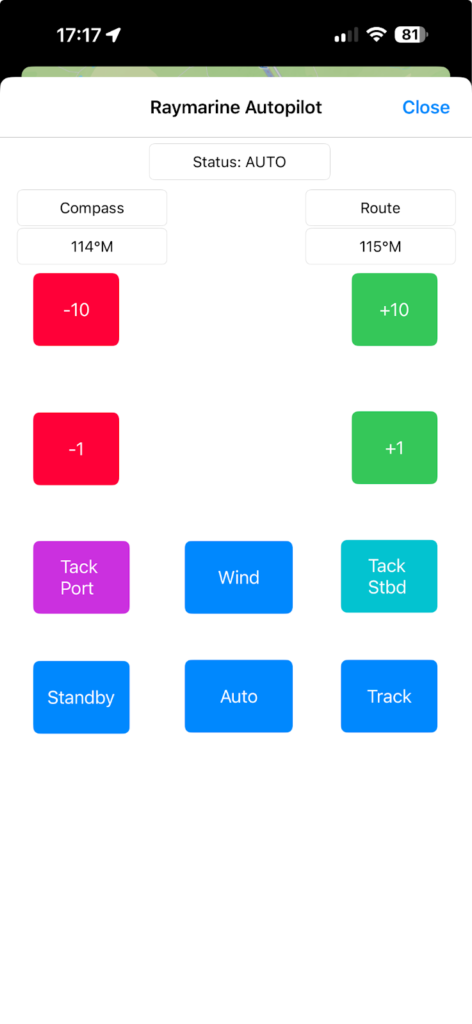
SeaNav can also remotely control the Auto tiller buttons and view its status (tap the autohelm button towards the top right of the screen in SeaNav to show the remote control buttons and Autopilot status) :-
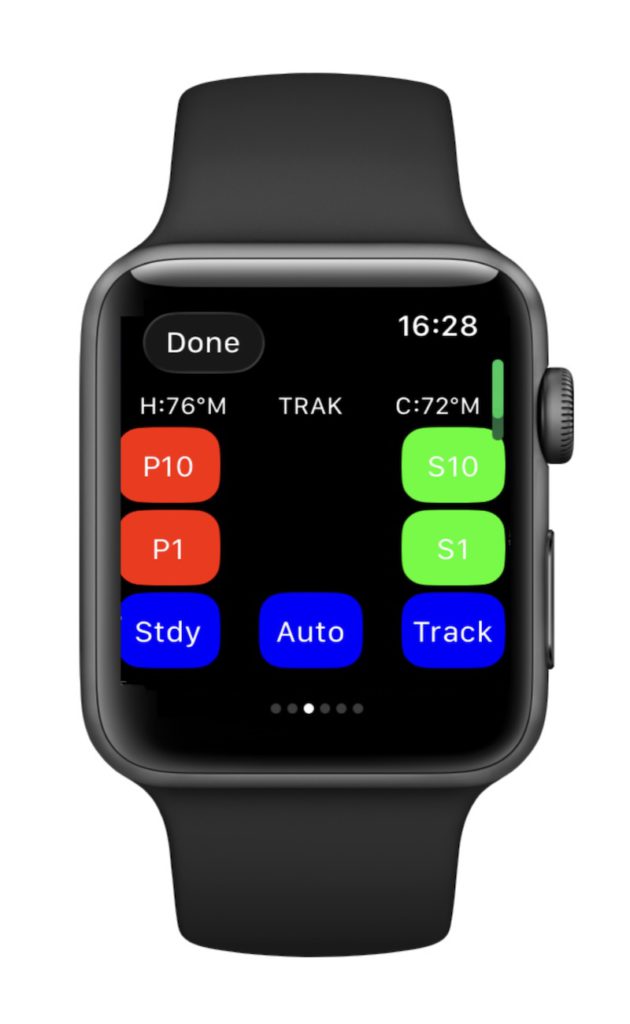
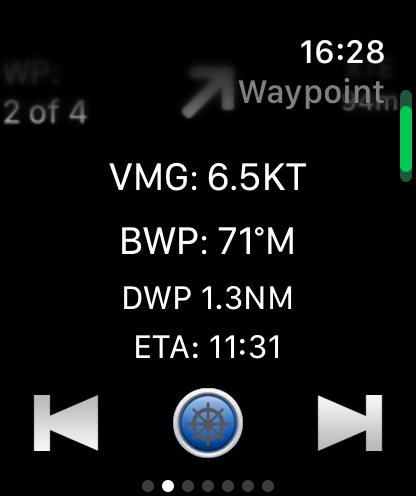
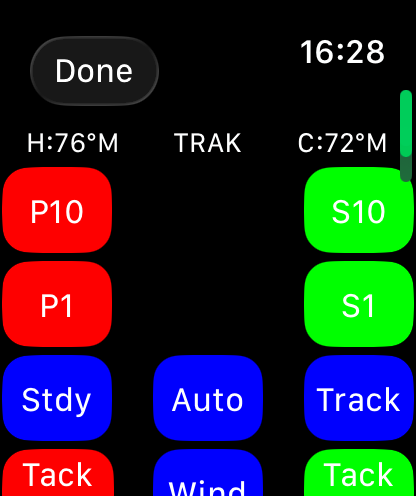
The SeaNav Apple Watch can also control the Raymarine AutoPilot. Tap the autopilot symbol (blue bottom centre) on the Waypoint watchface to view the AutoPilot status and controls:-
Setting up SeaNav to use a Raymarine AutoPilot with the NMEA3WIFI device.
Hardware setup
Raymarine ST1000+ and 2000+
Only 3 wires need to be connected, Yellow SeaTalk, 12V brown (+ve) and blue (-ve).
The Raymarine ST1000+/20000+ Tiller pilot has 5 wires in its connecting cable – brown, blue, yellow, green and white.

Connect the yellow SeaTalk wire/terminal(4) from the Raymarine Autohelm/tiller to the Data terminal (3rd in from the left) on the NMEA3WIFI.

Connect 12V and GND on the NMEA3WIFI to the 12V brown (+ve) and blue (-ve) auto tiller power leads or boat supply (pin 1 +and 2 -).
Raymarine ST4000+
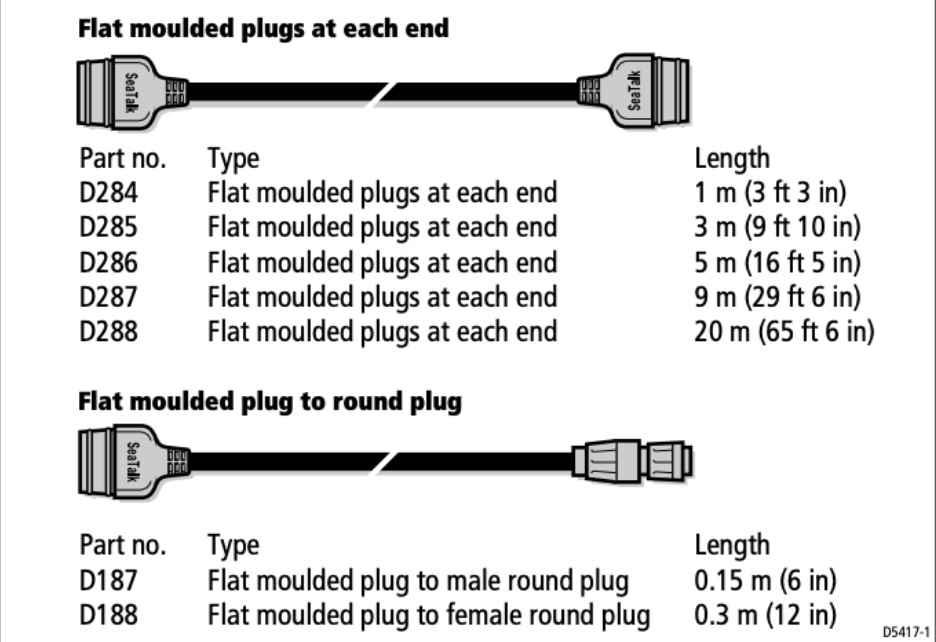
Connect the NMEA3WIFI to 12V and the SeaTalk bus using a SeaTalk cable from the control unit rear as above. The correct part number for the cable with a connector one end and bare wires the other is D229 (also Rul-4001-136-A). You can use a SeaTalk cable and cut a connector off one end. The SeaTalk cable data wire is yellow, the + and – 12V wires are usually red (+ve) and black (-ve/gnd).
NMEA3WIFI configuration
You need to have Version 2.9 or later of the firmware to work correctly with iOS*. You can get the latest firmware from here:-
You can auto-configure the NMEA3WIFI with one tap directly from SeaNav. Make sure your iPhone is connected to the NMEA3WIFI network in your device Wifi Settings. Open SeaNav and go to Settings/Advanced Settings and then tap the bottom line. It will let you know if its successfully updated the NMEA3WIFI settings for you. You are then ready to start using it and can skip to the next section “iPhone and SeaNav configuration”
Alternatively you can configure the NMEA3WIF manually. Connect to the NMEA3WIFI by connecting to the NMEA3WIFI network and browsing to 192.168.4.1 in Safari or Chrome. On the Home page change the SSID to NMEA3WIFI:NG so that it will work correctly with iOS*.
You can also set the NMEA3WIFI to access via your local Wifi network (External network ) but this is not a necessity.
We need to set the gateway to receive commands via TCP from SeaNav and send them out over Seatalk and receive SeaTalk messages from the AutoPilot and send them out back to SeaNav. Set the SEATALK1 PORT SETTINGS as below ( ST->TCP).
You also need to set Additional Settings for the ST out to let SeaNav see the Raymarine Autopilot status information. Change the ADDITIONAL SEATALK1 SETTINGS from 0: Default to 1: ADD SOME $STALK and then tap SAVE and RETURN. See screenshot below.


Set the WIFI PORTS SETTINGS on the HOME page to 2001 for TCP and set TCP->ST so SeaNav can send proprietary SeaTalk data to the Autopilot.
*The :NG suffix allows the iPhone/iPad to use cellular data for the internet at the same time as it is connected to the NMEA3WIFI network.
iPhone and SeaNav configuration
Set the iPhone to use the NMEA3WIFI:NG wifi network and connect to it. Check it is connected by browsing to 192.168.4.1 in Safari to see the NMEA3WIFI Home page.
Now configure SeaNav to talk and listen to the AutoPilot. Go to Settings/AIS, GPS & NMEA Link .
Configure it to use TCP to IP address 192.168.4.1 , port 2001 (theTCP port number we just set on the NMEA3WIFI). Set the AutoPilot switch on. If the hardware is all connected up you can tap Start and should see live data from the AutoPilot (via the NMEA3WIFI). Blue for received messages and green for sent.
You are now ready to sail a SeaNav route automatically. Just start sailing a route or to a point by tapping the Sailboat icon. If you want to disconnect SeaNav from the Autopilot tiller/helm tap the Standby button on the autopilot. Re-connect to the SeaNav route by tapping the Auto button. To completely disconnect, turn off the Autopilot switch in SeaNav Settings/AIS, GPS & NMEA Link or stop the link.
Setting up SeaNav to use a Navico (B&G,Simrad,Lowrance) auto tiller/helm or any other NMEA compliant autopilot.
Use an N2K0183 gateway to connect SeaNav to the Autopilot via Wifi and NMEA2000 or NMEA0183.
Hardware set up.
NMEA2000
Connect the N2K0183 to your NMEA2000 bus.
NMEA0183
Use the output from P2 (A2/B2) on the N2K0183 board to connect to the RX +/- inputs on the Autopilot. Connect the autopilot TX +/- (if available) to the P1 A1/B1 port connections.
N.B. A is equivalent to + and B to -.
N2K0183 configuration
You need to have Version 28 or later of the firmware* to work correctly with iOS. You can get the latest firmware from here:-
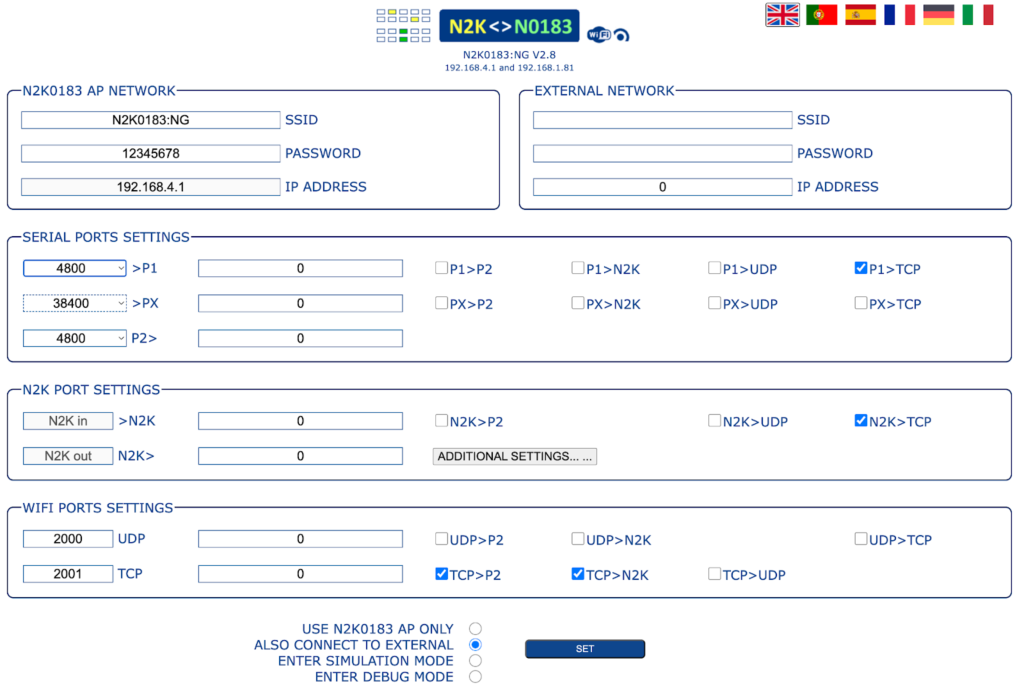
Connect to the N2K0183 by connecting to the N2K0183 network and browsing to 192.168.4.1 in Safari or Chrome. On the Home page change the SSID to N2K0183:NG so that it will work correctly with iOS and reconnect to it.
You can also set the N2K0183 to access via your local Wifi network (External network ) but this is not a necessity.
The configuration below works with NMEA2000 and NMEA0183. For NMEA0183 ensure the Serial port setting baud rates for P1 and P2 match the baud rate on your Autopilot. In the example below they are both set to 4800.
iPhone and SeaNav configuration
The same as for Raymarine above except to connect to the N2K0183:NG Wifi network.
N.B. There is no remote button control capability for Navico autopilots like there is with Raymarine.